|
|
 发表于 2023-1-15 14:35:43
|
显示全部楼层
发表于 2023-1-15 14:35:43
|
显示全部楼层
组件化开发
什么是组件化开发
组件化开发 指的是:根据封装的思想,把页面上 可重用的部分 封装为 组件,从而方便项目的 开发 和 维护。
一个页面, 可以拆分成一个个组件,一个组件就是一个整体, 每个组件可以有自己独立的 结构 样式 和 行为
例如:http://www.ibootstrap.cn/ 所展示的效果,就契合了组件化开发的思想。
用户可以通过拖拽组件的方式,快速生成一个页面的布局结构。
前端组件化开发的好处主要体现在以下两方面:
- 提高了前端代码的复用性和灵活性
- 提升了开发效率和后期的可维护性
vue 是一个完全支持组件化开发的框架。vue 中规定组件的后缀名是 .vue。
组件的注册
刚才我们创建使用的是 App.vue 根组件, 这个比较特殊, 是最大的一个根组件
而App.vue根组件内, 还可以写入一些小组件, 而这些组件, 要使用, 就需要先注册!
注册组件有两种注册方式: 分为“全局注册”和“局部注册”两种
- 被全局注册的组件,可以在任意的组件模板范围中使用 通过Vue.component()
- 被局部注册的组件,只能在当前注册的组件模板范围内使用 通过components
局部注册
- 把独立的组件封装一个.vue文件中,推荐放到components文件夹
components
-- HmHeader.vue
-- HmContent.vue
-- HmFooter.vue
import HmHeader from './components/HmHeader'
import HmContent from './components/HmContent'
import HmFooter from './components/HmFooter'
export default {
// data methods filters computed watch
components: {
// 组件名: 组件
// 组件名:注意,不能和html内置的标签重名
// 使用的时候:直接通过组件名去使用
// HmHeader HmHeader hm-header
HmHeader,
HmContent,
HmFooter
}
}
==注意点:注册的组件的名字不能和HTML内置的标签重名==
- 可以在模板中使用组件,,,,使用组件和使用html的标签是一样的,,,可以多次使用
<template>
<div>
<!-- 组件注册好了,就跟使用html标签一样了 -->
<hm-header></hm-header>
<hm-content></hm-content>
<hm-footer></hm-footer>
</div>
</template>
==局部注册的组件只能在当前组件中使用==
全局注册组件
components
-- HmHeader.vue
-- HmContent.vue
-- HmFooter.vue
- 在main.js中通过Vue.component()全局注册组件
import HmHeader from &#39;./components/HmHeader&#39;
import HmContent from &#39;./components/HmContent&#39;
import HmFooter from &#39;./components/HmFooter&#39;
// 全局注册
// Vue.component(名字, 组件)
Vue.component(&#39;HmHeader&#39;, HmHeader)
Vue.component(&#39;HmContent&#39;, HmContent)
Vue.component(&#39;HmFooter&#39;, HmFooter)
<template>
<div>
<!-- 组件注册好了,就跟使用html标签一样了 -->
<hm-header></hm-header>
<hm-content></hm-content>
<hm-footer></hm-footer>
</div>
</template>
==注意:全局注册的组件 可以在任意的组件中去使用==
组件名的大小写
在进行组件的注册时,定义组件名的方式有两种:
- 注册使用短横线命名法,例如 hm-header 和 hm-main Vue.component(&#39;hm-button&#39;, HmButton) 使用时 <hm-button> </hm-button>
- 注册使用大驼峰命名法,例如 HmHeader 和 HmMain Vue.component(&#39;HmButton&#39;, HmButton) 使用时 <HmButton> </HmButton> 和 <hm-button> </hm-button> 都可以
推荐定义组件名时, 用大驼峰命名法, 更加方便
全局注册
Vue.component(&#39;HmButton&#39;, HmButton)
局部注册:
components: {
HmHeader,
HmMain,
HmFooter
}
使用时, 推荐遵循html5规范, 小写横杠隔开
<hm-header></hm-header>
<hm-main></hm-main>
<hm-footer></hm-footer>
通过 name 注册组件 (了解)
组件在开发者工具中显示的名字可以通过name进行修改 在注册组件期间,除了可以直接提供组件的注册名称之外,还可以把组件的 name 属性作为注册后组件的名称
组件内容:
<template>
<button>按钮组件</button>
</template>
<script>
export default {
name: &#39;HmButton&#39;
}
</script>
<style lang=&#34;less&#34;>
button {
width: 80px;
height: 50px;
border-radius: 5px;
background-color: pink;
}
</style>
进行注册:
import HmButton from &#39;./components/hm-button.vue&#39;
Vue.component(HmButton.name, HmButton) // 等价于 app.component(&#39;HmButton&#39;, HmButton)
组件的样式冲突 scoped
默认情况下,写在组件中的样式会全局生效,因此很容易造成多个组件之间的样式冲突问题。
组件样式默认会作用到全局, 就会影响到整个 index.html 中的 dom 元素
- 全局样式: 默认组件中的样式会作用到全局
- 局部样式: 可以给组件加上 scoped 属性, 可以让样式只作用于当前组件
<style lang=&#34;less&#34; scoped>
div {
background-color: pink;
}
</style>
原理:
- 添加scoped后, 会给当前组件中所有元素, 添加上一个自定义属性

- 添加scoped后, 每个style样式, 也会加上对应的属性选择器

最终效果: 必须是当前组件的元素, 才会有这个自定义属性, 才会被这个样式作用到
组件通信
每个组件都有自己的数据, 提供在data中, 每个组件的数据是独立的, 组件数据无法互相直接访问 (合理的)
但是如果需要跨组件访问数据, 就需要用到组件通信
组件通信的方式有很多: 现在先关注两种, 父传子 子传父
组件通信 - 父传子 props 传值
语法:
<Son price=&#34;100&#34; title=&#34;不错&#34; :info=&#34;msg&#34;></Son>
props: [&#39;price&#39;, &#39;title&#39;, &#39;info&#39;]
需求: 封装一个商品组件 my-product

my-product.vue
<template>
<div class=&#34;my-product&#34;>
<h3>标题: {{ title }}</h3>
<p>价格: {{ price }}元</p>
<p>{{ info }}</p>
</div>
</template>
<script>
export default {
props: [&#39;title&#39;, &#39;price&#39;, &#39;info&#39;]
}
</script>
<style>
.my-product {
width: 400px;
padding: 20px;
border: 2px solid #000;
border-radius: 5px;
margin: 10px;
}
</style>v-for 遍历展示组件练习
需求: 遍历展示商品列表
假定, 发送请求回来的商品数据,
list: [
{ id: 1, proname: &#39;超级好吃的棒棒糖&#39;, proprice: 18.8 },
{ id: 2, proname: &#39;超级好吃的大鸡腿&#39;, proprice: 34.2 },
{ id: 3, proname: &#39;超级无敌的冰激凌&#39;, proprice: 14.2 }
]
v-for 遍历展示
<template>
<div class=&#34;container&#34;>
<h3>我是app组件的内容</h3>
<my-product
v-for=&#34;item in list&#34; :key=&#34;item.id&#34;
:price=&#34;item.proprice&#34;
:title=&#34;item.proname&#34;
:info=&#34;msg&#34;>
</my-product>
</div>
</template>

单向数据流
/*
在vue中需要遵循单向数据流原则
1. 父组件的数据发生了改变,子组件会自动跟着变
2. 子组件不能直接修改父组件传递过来的props props是只读的
*/
==如果父组件传给子组件的是一个对象,子组件修改对象的属性,是不会报错的,,,,也应该避免==
组件通信 - 子传父
需求: 砍价
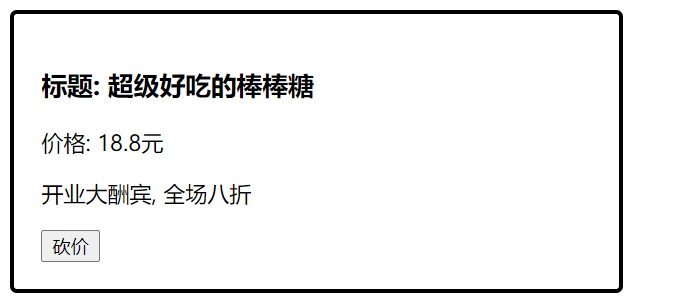
- 子组件可以通过 this.$emit(&#39;事件名&#39;, 参数1, 参数2, ...) 触发事件的同时传参的 this.$emit(&#39;sayPrice&#39;, 2)
- 父组件给子组件注册一个自定义事件 <my-product ... @sayPrice=&#34;sayPrice&#34;> </my-product> 父组件并提供对应的函数接收参数 methods: { sayPrice (num) { console.log(num) } },
props 校验
props 是父传子, 传递给子组件的数据, 为了提高 子组件被使用时 的稳定性, 可以进行props校验, 验证传递的数据是否符合要求
默认的数组形式, 不会进行校验, 如果希望校验, 需要提供对象形式的 props
风格指南:https://cn.vuejs.org/v2/style-guide/#Prop-%E5%AE%9A%E4%B9%89%E5%BF%85%E8%A6%81
props: {
...
}
props 提供了多种数据验证方案,例如:
- 基础的类型检查 Number
- 多个可能的类型 [String, Number]
- 必填项校验 required: true
- 默认值 default: 100
- 自定义验证函数
官网语法: 地址
{
props: {
// 基础的类型检查
propA: Number,
// 多个可能的类型
propB: [String, Number],
// 必填的字符串
propC: {
type: String,
required: true
},
// 带有默认值的数字
propD: {
type: Number,
default: 100
},
// -------------------------------------------------------------------------
// 自定义验证函数
propF: {
validator: function (value) {
// 这个值必须匹配下列字符串中的一个
return [&#39;success&#39;, &#39;warning&#39;, &#39;danger&#39;].indexOf(value) !== -1
}
}
}
}
任务列表案例
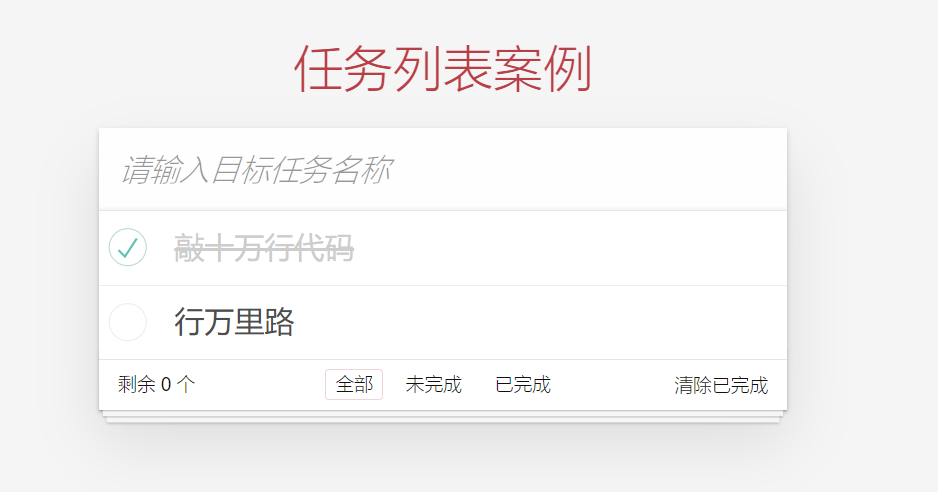
封装组件
- 封装三个组件TodoHeader.vue, TodoMain.vue, TodoFooter.vue
- 在App.vue局部注册三个组件
import TodoHeader from &#39;./components/TodoHeader&#39;
import TodoMain from &#39;./components/TodoMain&#39;
import TodoFooter from &#39;./components/TodoFooter&#39;
export default {
// 局部注册组件
components: {
TodoHeader,
TodoMain,
TodoFooter
},
}
<template>
<section class=&#34;todoapp&#34;>
<todo-header></todo-header>
<todo-main></todo-main>
<todo-footer></todo-footer>
</section>
</template>
import &#39;./styles/base.css&#39;
import &#39;./styles/index.css&#39;
列表的渲染
data () {
return {
list: [
{ id: 1, name: &#39;吃饭&#39;, isDone: true },
{ id: 2, name: &#39;睡觉&#39;, isDone: false },
{ id: 3, name: &#39;打豆豆&#39;, isDone: true }
]
}
}
- App.vue通过父传子,把list数据传给TodoMain.vue
<!-- 父传子 -->
<todo-main :list=&#34;list&#34;></todo-main>
props: {
list: {
type: Array,
required: true,
},
},
<ul class=&#34;todo-list&#34;>
<!-- completed: 完成的类名 -->
<li :class=&#34;{completed: item.isDone}&#34; v-for=&#34;item in list&#34; :key=&#34;item.id&#34;>
<div class=&#34;view&#34;>
<input class=&#34;toggle&#34; type=&#34;checkbox&#34; v-model=&#34;item.isDone&#34;>
<label>{{item.name}}</label>
<button class=&#34;destroy&#34;></button>
</div>
<input class=&#34;edit&#34; value=&#34;Create a TodoMVC template&#34;>
</li>
</ul>
任务删除功能
<button class=&#34;destroy&#34; @click=&#34;del(item.id)&#34;></button>
methods: {
del (id) {
// console.log(id)
this.$emit(&#39;del&#39;, id)
}
}
<todo-main :list=&#34;list&#34; @del=&#34;delFn&#34;></todo-main>
methods: {
delFn (id) {
// 把id过滤掉
this.list = this.list.filter(item => item.id !== id)
}
}
任务状态修改功能
v-model和父组件双向数据绑定,违反单向数据流的原则。
<input class=&#34;toggle&#34; type=&#34;checkbox&#34; :checked=&#34;item.isDone&#34; >
<input class=&#34;toggle&#34; type=&#34;checkbox&#34; :checked=&#34;item.isDone&#34; @change=&#34;change(item.id)&#34;>
change (id) {
this.$emit(&#39;change&#39;, id)
}
<todo-main :list=&#34;list&#34; @del=&#34;delFn&#34; @change=&#34;changeFn&#34;></todo-main>
changeFn (id) {
const result = this.list.find(item => item.id === id)
result.isDone = !result.isDone
}
任务的添加功能
- 在TodoHeader.vue组件中通过v-model获取到任务的名字
<input class=&#34;new-todo&#34; placeholder=&#34;What needs to be done?&#34; autofocus v-model.trim=&#34;name&#34;>
data () {
return {
name: &#39;&#39;
}
},
<input class=&#34;new-todo&#34; placeholder=&#34;What needs to be done?&#34; autofocus v-model.trim=&#34;name&#34; @keyup.enter=&#34;add&#34;>
methods: {
add () {
// 子传父
this.$emit(&#39;add&#39;, this.name)
// 清空内容
this.name = &#39;&#39;
}
}
<todo-header @add=&#34;addFn&#34;></todo-header>
addFn (name) {
this.list.unshift({
id: Date.now(),
name,
isDone: false
})
}
剩余任务的统计功能
- 父传子,把list传给TodoFooter.vue组件
<todo-footer :list=&#34;list&#34;></todo-footer>
props: {
list: {
type: Array,
required: true,
},
},
- footer组件提供了一个计算属性,用于统计未完成的任务
computed: {
leftCount () {
// 统计的未完成的任务的数量
return this.list.filter(item => item.isDone === false).length
}
}
<footer class=&#34;footer&#34; v-if=&#34;list.length > 0&#34;>
<span class=&#34;todo-count&#34;>
<strong>{{ leftCount }}</strong> item left
</span>
清空功能
computed: {
// 获取所有未完成的任务的数量
leftCount() {
const arr = this.list.filter((item) => !item.isDone)
return arr.length
},
// 如果list中有一个或者多个完成的任务,就应该显示
isShowClear() {
return this.list.some((item) => item.isDone)
},
},
<button v-show=&#34;isShowClear&#34; class=&#34;clear-completed&#34; @click=&#34;clear&#34;>
Clear completed
</button>
methods: {
clear() {
// 清空已经完成的任务 过滤,保留未完成的任务
this.$emit(&#39;clear&#39;)
},
},
<TodoFooter :list=&#34;list&#34; @clear=&#34;clearFn&#34;></TodoFooter>
clearFn() {
// console.log(&#39;清空&#39;)
this.list = this.list.filter((item) => item.isDone === false)
},
底部筛选功能-点击高亮
<li>
<a
+ @click.prevent=&#34;filter(&#39;all&#39;)&#34;
:class=&#34;{ selected: type === &#39;all&#39; }&#34;
href=&#34;#/&#34;
>All</a
>
</li>
<li>
<a
+ @click.prevent=&#34;filter(&#39;active&#39;)&#34;
href=&#34;#/active&#34;
:class=&#34;{ selected: type === &#39;active&#39; }&#34;
>Active</a
>
</li>
<li>
<a
+ @click.prevent=&#34;filter(&#39;completed&#39;)&#34;
href=&#34;#/completed&#34;
:class=&#34;{ selected: type === &#39;completed&#39; }&#34;
>Completed</a
>
</li>
data() {
return {
type: &#39;all&#39;,
}
},
filter(type) {
this.type = type
},
<li>
<a
@click.prevent=&#34;filter(&#39;all&#39;)&#34;
+ :class=&#34;{ selected: type === &#39;all&#39; }&#34;
href=&#34;#/&#34;
>All</a
>
</li>
<li>
<a
@click.prevent=&#34;filter(&#39;active&#39;)&#34;
href=&#34;#/active&#34;
+ :class=&#34;{ selected: type === &#39;active&#39; }&#34;
>Active</a
>
</li>
<li>
<a
@click.prevent=&#34;filter(&#39;completed&#39;)&#34;
href=&#34;#/completed&#34;
+ :class=&#34;{ selected: type === &#39;completed&#39; }&#34;
>Completed</a
>
</li>
状态提升
考虑到,过滤条件影响到footer,也会影响到main的展示,需要进行状态提升
data () {
return {
list: [
{ id: 1, name: &#39;吃饭&#39;, isDone: false },
{ id: 2, name: &#39;睡觉&#39;, isDone: true },
{ id: 3, name: &#39;打豆豆&#39;, isDone: false }
],
type: &#39;all&#39;
}
},
// App.vue绑定:
<hm-footer :type=&#34;type&#34;></hm-footer>
// 子组件接收:
props: {
list: Array,
type: String
},
filter (type) {
// this.type = type
this.$emit(&#39;changeType&#39;, type)
}
<hm-footer @changeType=&#34;changeType&#34; :type=&#34;type&#34;></hm-footer>
changeType (type) {
this.type = type
}
过滤功能完成
提供计算属性完成切换
computed: {
showList () {
if (this.type === &#39;completed&#39;) { // 显示已完成
return this.list.filter(item => item.isDone === true)
} else if (this.type === &#39;active&#39;) { // 显示未完成
return this.list.filter(item => item.isDone === false)
} else {
return this.list // 全部显示
}
}
}
本地存储
watch: {
list: {
deep: true,
handler(newValue) {
localStorage.setItem(&#39;todoList&#39;, JSON.stringify(newValue))
}
}
}
data(){
return {
list: JSON.parse(localStorage.getItem(&#39;todoList&#39;)) || [],
}
},
全选功能
- TodoMain.vue提供一个计算属性,用于控制 全选的状态
isCheckAll() {
return this.list.every((item) => item.isDone === true)
}
<input
id=&#34;toggle-all&#34;
class=&#34;toggle-all&#34;
type=&#34;checkbox&#34;
v-model=&#34;isCheckAll&#34;
/>
- 计算属性默认无法修改,不支持双向绑定, 修改时子传父
// 要求:list中isDone全部为true,才能是true 否则是false
isCheckAll: {
get() {
return this.list.every((item) => item.isDone === true)
},
set(value) {
// console.log(value)
this.$emit(&#39;checkAll&#39;, value)
},
},
<TodoMain
@checkAll=&#34;checkAllFn&#34;
></TodoMain>
checkAllFn(value) {
this.list.forEach((item) => (item.isDone = value))
}
<hr/>
其他优质文章 :
前端行业发展:
- Web 前端分为哪几个大方向,工资待遇如何,辛苦吗?
- 找前端工作会不会很难?
- 现在web前端的工资怎样?
- 前端开发就业情况如何?
前端工作内容:
- 前端工程师主要工作内容是什么?
- 前端开发是做什么的?工作职责有哪些?
前端学习路线:
前端必读书籍:
面试相关:
- 关于前端Vue框架的面试题,面试官可能会问到哪些?
- 【一定要收藏】32000字的前端面试题总结!!!
- web前端简历个人技能该怎么写?
- 前端简历中项目描述怎么写能够更加的优雅?
- 面试前端工程师简历应该怎么写才容易通过?
- 自学 web 前端人怎么找工作?
- 自学前端简历怎么写啊?
HTML教程:
- HTML5入门教程(含新特性),从入门到精通
- HTML图文教程(表单域/文本框与密码框/单选按钮与复选框)
- HTML图文教程(选按钮与复选框/input标签/提交按钮与重置按钮)
- HTML图文教程(通按钮/文件域/label/下拉表单)
- HTML零基础入门教程, 零基础学习HTML网页制作(HTML基本结构)
- HTML零基础入门教程, 零基础学习HTML网页制作(HTML 标签)
Koa2教程:
- Koa2框架是什么?Koa框架教程快速入门Koa中间件
- Koa2框架路由应用,Koa2前景、Koa2中间件
- Koa2异常处理
VUE教程:
- 最全的vue学习教程来了,vue模块化组件超级好用,vue项目推荐,vue项目结构搭建,案例分析
其他:
- 13 个有趣且实用的 CSS 框架 / 组件
- 有哪些好的前端社区?
看完两件事
看完这个篇内容之后,如果对你有帮助,我想请您帮我个小忙
1、点赞,双击屏幕有惊喜哦~
2、关注我,以后精彩回答你都可以第一时间收到
感谢您的支持!! |
|

